K8sGPT: Troubleshoot and Debug your Kubernetes Cluster with AI
10 minutes
Introduction
Infusion of AI in the DevOps world is a hot topic nowadays. The surge in popularity of LLMs is so massive that even the Kubernetes-powered DevOps tech stack is touched by this trend. A multitude of fascinating projects that utilize LLM for text generation are emerging regularly. If you are a developer, you have probably heard of or already got a taste of GitHub Copilot, CodeGPT, or IntelliCode (IDE).
I've only listed three AI tools here, but as a developer, you will likely come across countless more AI tools in the future. In DevOps, an ecosystem dedicated to Kubernetes's AI workloads has emerged. K8sGPT is one among them. But then where and how will we use k8sGPT in the Kubernetes-powered DevOps tech stack and what is it all about?
In this article, we will explore the concept of K8sGPT, its setup process, and techniques for troubleshooting a Kubernetes cluster using K8sGPT.
What is K8sGPT?
K8sGPT is a fairly recent open-source initiative that employs LLM models to decode error messages in Kubernetes and offer insights into cluster operations.
The goal of k8sGPT is to make it easier to understand, locate, and solve problems in a Kubernetes cluster by using AI to explain issues, suggest solutions, and provide fixes.
How does K8sGPT work?
K8sGPT provides you insights into a Kubernetes cluster in three steps namely - Extraction, Filtration, and Generation.
In the first step, K8sGPT extracts the configuration details of all the workloads currently deployed in the Kubernetes cluster.
The K8sGPT does not require all configuration details for deployed workloads. Instead, during the filtration process, a component called an analyzer is utilized. This component, which contains the SRE experience codified, is responsible for analyzing and filtering only the necessary data from the extraction step.
In this step, K8sGPT transmits the filtered data to an AI backend. The AI backend provides you with a precise explanation to address any issues within your Kubernetes cluster. The default AI backend of K8sGPT is OpenAI. You can also switch to any another AI backend from the following list.
openailocalaiollamaazureopenaicohereamazonbedrockamazonsagemakergooglehuggingfacenoopaigooglevertexaiwatsonxai
Install K8sGPT
Various installation options are available based on your likes and the operating system you use. These options are outlined in the installation guide section of the documentation.
Linux/Mac via brew
$ brew install k8sgptor
$ brew tap k8sgpt-ai/k8sgpt
$ brew install k8sgpt
RPM-based installation (RedHat/CentOS/Fedora)
32 bit:
$ curl -LO https://github.com/k8sgpt-ai/k8sgpt/releases/download/v0.3.38/k8sgpt_386.rpm
$ sudo rpm -ivh k8sgpt_386.rpm
64 bit:
$ curl -LO https://github.com/k8sgpt-ai/k8sgpt/releases/download/v0.3.38/k8sgpt_amd64.rpm
$ sudo rpm -ivh -i k8sgpt_amd64.rpm
DEB-based installation (Ubuntu/Debian)
32 bit:
$ curl -LO https://github.com/k8sgpt-ai/k8sgpt/releases/download/v0.3.38/k8sgpt_386.deb
$ sudo dpkg -i k8sgpt_386.deb
64 bit:
$ curl -LO https://github.com/k8sgpt-ai/k8sgpt/releases/download/v0.3.38/k8sgpt_amd64.deb
$ sudo dpkg -i k8sgpt_amd64.deb
APK-based installation (Alpine)
32 bit:
$ curl -LO https://github.com/k8sgpt-ai/k8sgpt/releases/download/v0.3.38/k8sgpt_386.apk
$ apk add k8sgpt_386.apk
64 bit:
$ curl -LO https://github.com/k8sgpt-ai/k8sgpt/releases/download/v0.3.38/k8sgpt_amd64.apk
$ apk add k8sgpt_amd64.apk
Windows
Download the latest Windows binaries of k8sgpt from here based on your system architecture.
Extract and move the downloaded package to your desired location. Adjust the system path variable with the binary location of k8sgpt.
Check out more on the installation procedure from K8sGPT documentation.
Configure OpenAI as a backend for K8sGPT
Once you've installed K8sGPT, the next step is to configure this tool to evaluate your Kubernetes cluster. This process involves connecting to a backend AI service provider that will be used to identify any problems within your Kubernetes cluster.
K8sGPT is designed to work with multiple AI backend providers. At this stage, you have the option to select the back-end service you wish to utilize for K8sGPT. In this article, we will set up the AI framework OpenAI and Ollama as the back-end provider for K8sGPT.
Start configuring K8sGPT with the following command .
$ k8sgpt --helpList all the available authentications and verify if OpenAI is the default backend AI service provider.
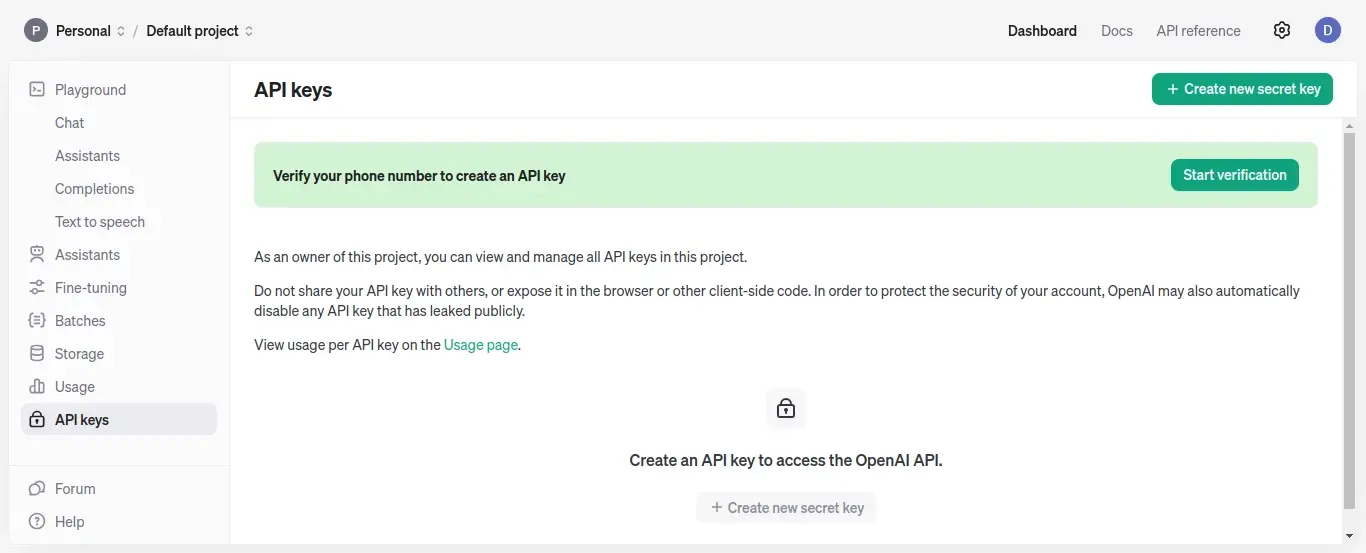
$ k8sgpt auth listYour next step is to create an account in OpenAI and create an API key.
Alternatively, you can create an account in OpenAI by running the following command from the terminal which will open the URL in the browser.
$ k8sgpt generate
Once you have created the token through the OpenAI dashboard, execute the following command and copy/paste the token into the terminal to verify with the OpenAI backend.
$ k8sgpt auth add openai
The setup process will be completed once you are verified with the backend AI provider. You are now ready to analyze your Kubernetes cluster with K8sGPT.
In the meantime, if you desire Ollama as your backend AI provider, please follow the instructions outlined in the subsequent section. Otherwise, skip this step and analyze your Kubernetes cluster using this section.
Configure Ollama as a backend for K8sGPT
OpenAI as a backend for AI providers needs a subscription(paid). Should you anticipate exhausting your API quota with OpenAI, Ollama can be selected as the alternative default AI service provider.
Ollama(Optimized LLaMA) is an open-source and publicly available advanced large-model tool designed to facilitate straightforward installation and operation of different large models both on-premises and in the cloud environments.
In other words, Ollama is a command line utility designed for the download and execution of open-source language models like Llama3, Mistral, Phi-3, among others.
Install Ollama
On any Linux distro, you can install Ollama with the following script.
$ curl -sSL https://ollama.com/install.sh | sh
The above command will install and start Ollama API automatically on port 11434. Check the Ollama version and its PID.
$ ollama -v
Verify open port of ollama.
$ netstat -pltn | grep ollama
Run Llama3
Llama 3, an open source large language model offered by Meta, is available in two versions: one with 8 billion parameters and another with 70 billion parameters. Stick with the 8B version since the memory requirement is nearly half that of 70B version. The download size of the llama3 8B version is 4.7GB.
Memory Requirements:
To make full use of Llama 3's sophisticated capabilities, you need a proper graphics card(GPU) with at least 16GB of VRAM, and it's recommended to add an extra 16GB of RAM to the system for optimal performance.
However, for running a small model, any modern CPU with at least 4 cores and 8GB of RAM is sufficient.
To download and run llama3 using Ollama, just execute the following command.
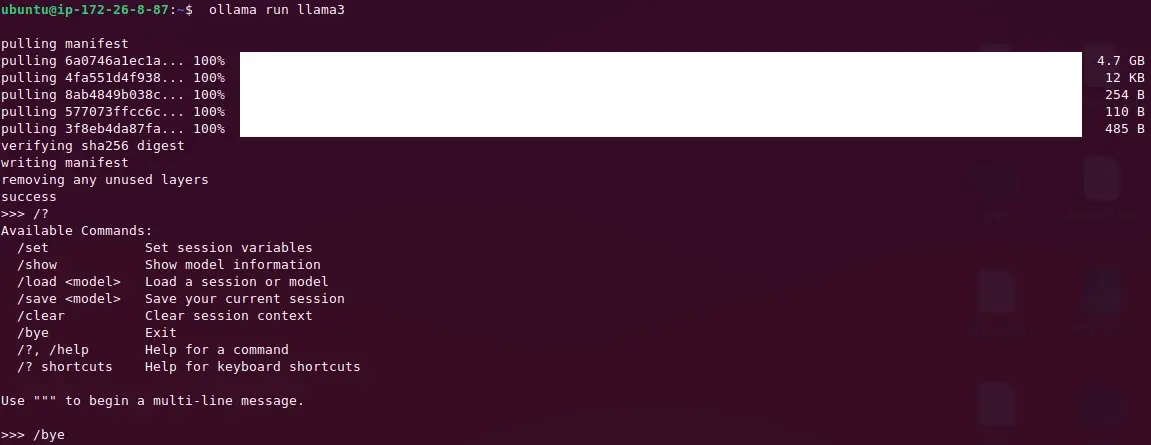
$ ollama run llama3
With my VM's configuration setting of 8GB RAM and 4 CPUs, it took around 70 seconds to start.
Set up the Ollama REST API as the back-end service for K8sGPT. Choose the backend category as localai, which works well with the OpenAI API, but the real provider in operation will be Ollama with Llama 3.
$ k8sgpt auth add --backend localai --model llama3 --baseurl http://localhost:11434/v1
Make it a default provider.
$ k8sgpt auth default --provider localai
This completes the setup needed to use Ollama as a backend for K8sGPT.
How to analyze your Kubernetes cluster with K8sGPT
Let's create a faulty web deployment by specifying a non-existent image version(nginx:1.27.30) and try to analyze the Kubernetes cluster using K8sGPT.
apiVersion: apps/v1
kind: Deployment
metadata:
  name: nginx
  labels:
    app: nginx
spec:
  replicas: 3
  selector:
    matchLabels:
      app: nginx
  template:
    metadata:
      labels:
        app: nginx
    spec:
      containers:
      - name: nginx
        image: nginx:1.27.30
Create a deployment from the above Kube manifest.
$ kubectl deploy -f faulty-deploy.yaml
deployment.apps/nginx created
Check the status of the pods.
$ kubectl get po
NAME                     READY   STATUS             RESTARTS   AGE
nginx-7744bd8cc9-gx8fj   0/1     ErrImagePull       0          19s
nginx-7744bd8cc9-rqspr   0/1     ErrImagePull       0          19s
nginx-7744bd8cc9-z5jgp   0/1     ImagePullBackOff   0          19s
As you can see, the pod's current status is designated as ImagePullBackOff, indicating that the requested NGINX image was not found within the docker repository. Let's analyze the cluster with K8sGPT.
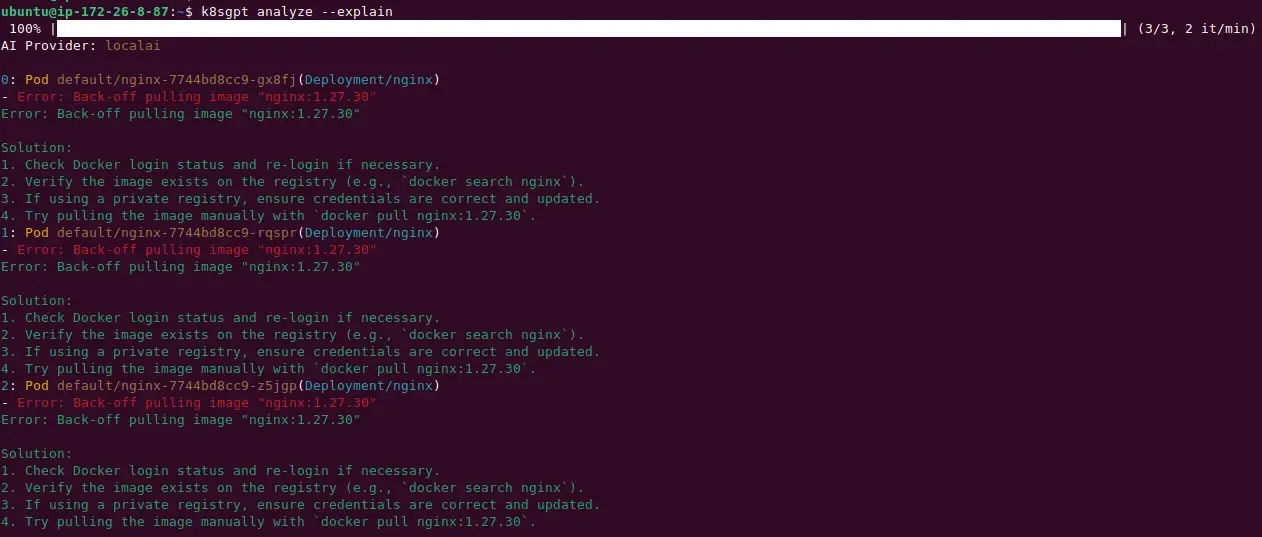
$ k8sgpt analyze --explain
You can see from the above screenshot that K8sGPT provides you with a list of existing problems within the Kubernetes cluster which includes malfunctioning of the above deployment as an issue within the list. K8sGPT also suggests several points that you could experiment with for a potential solution.
To get a trimmed result, use available options like --filter , --namespace and --output with the K8sGPT command.
$ k8sgpt analyze --explain --filter=Pod --namespace=default --output=json
To get a list of all the available filters, use the following command.
$ k8sgpt filters listTo get a full list of available options with the K8sGPT analyze command, use the following command.
$ k8sgpt analyze --helpAt this point, You have successfully analyzed your Kubernetes cluster using K8sGPT.
K8sGPT Operator
Another method to set up K8sGPT within your Kubernetes cluster is by utilizing K8sGPT Operator. This implies that you can operate K8sGPT as an additional service in a Kubernetes cluster that works in conjunction with your existing applications. In this method, the generated K8sGPT scan reports are stored as a YAML file.
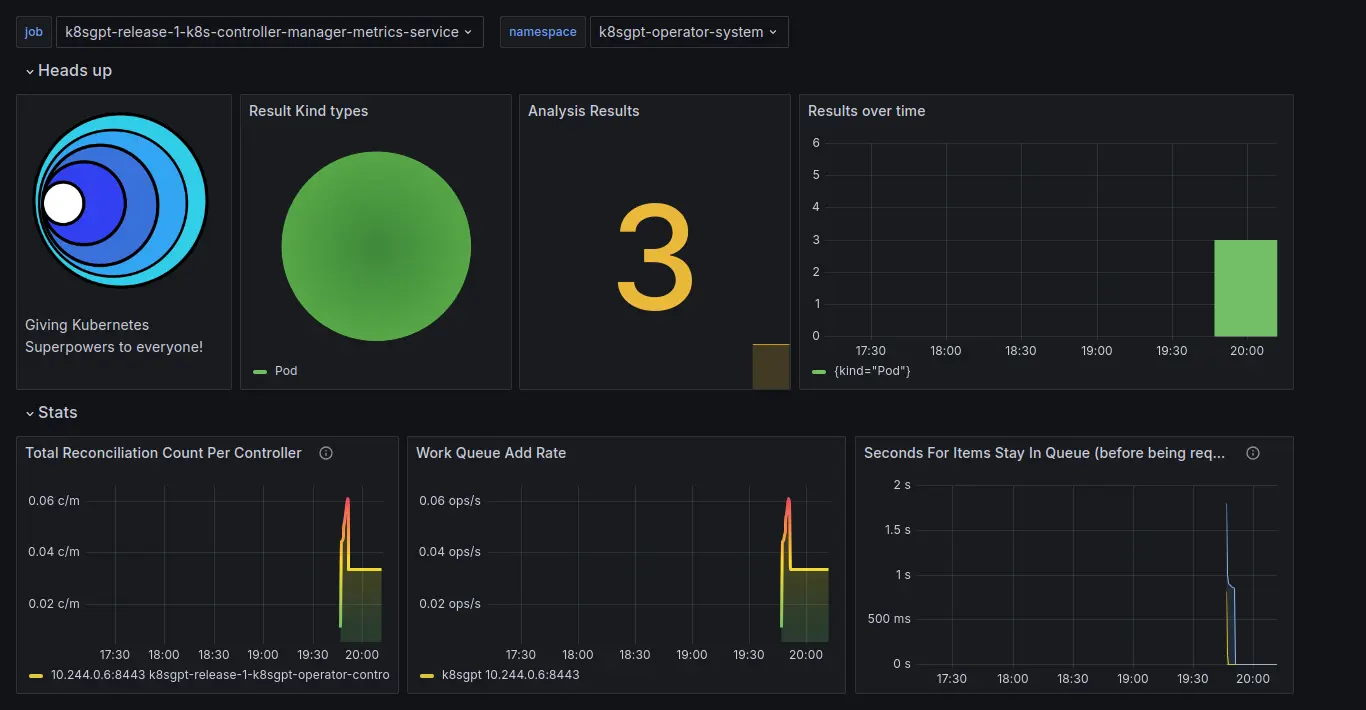
Moreover, You can combine K8sGPT operator with Prometheus and Grafana to have better control and easy monitoring capabilities over the Kubernetes cluster. Integrating Prometheus and Grafana with K8sGPT is a choice, and it's up to you whether you decide to proceed with it or not.
Installation of K8sGPT operator
Follow the instructions given below to install K8sGPT operator in your cluster. Begin by adding the K8sGPT helm repository, followed by an update to the helm repository, and then pull the repo.
$ helm repo add k8sgpt https://charts.k8sgpt.ai/
$ helm repo update
$ helm pull k8sgpt/k8sgpt-operator
Extract the downloaded k8sgpt-operator folder and update values.yaml file to include Prometheus and Grafana dashboard. In case you opt out of the Prometheus and Grafana dashboard, there is no need to update values.yaml.
$ tar xf k8sgpt-operator-0.1.6.tgz
$ cd ~/k8sgpt-operator
~/k8sgpt-operator$ vi values.yaml
These two options namely serviceMonitor and enableDashboard instruct K8sGPT to set Grafana dashboard and enable ServiceMonitor. The service monitor in turn will pull metrics from the scan reports, send it across Prometheus DB, and enabling Grafana Dashboard option will create a dashboard for K8sGPT.
~/k8sgpt-operator$ helm install k8sgpt-release-1 k8sgpt/k8sgpt-operator -n k8sgpt-operator-system --create-namespace --values values.yamlThe K8sgpt-operator offers two CRDs namely K8sGPT for the configuration of K8sGPT and Result for the generation of analysis results.
Since you have enabled the service monitor and Grafana dashboard in K8sGPT, you also need to install the kube-prometheus helm chart to access the Grafana dashboard. Skip to the next step if you haven't turned on the service monitor and Grafana dashboard in the previous step.
Install the Prometheus community version with the following helm commands.
$ helm repo add prometheus https://prometheus-community.github.io/helm-charts
$ helm repo update
$ helm install prometheus prometheus/kube-prometheus-stack -n k8sgpt-operator-system --set prometheus.prometheusSpec.serviceMonitorSelectorNilUsesHelmValues=false
Get the status of Prometheus and K8sGPT pods.
$ kubectl get po -n k8sgpt-operator-system
With K8sGPT and Prometheus now deployed in the Kubernetes cluster, all that's left to do is get OpenAI or Ollama as the AI backend provider for K8sGPT. We'll go over each choice, but as we've done before, we'll use Ollama as the backend AI provider for K8sGPT.
If you have opted for OpenAI as backend AI provider, create a Kubernetes secret based on the OpenAI token that you have. For Ollama users there is no need to create a secret.
$ export OPENAI_TOKEN=<Your OpenAI Token>
$ kubectl create secret generic k8sgpt-openai-secret --from-literal=openai-api-key=$OPENAI_TOKEN -n k8sgpt-operator-system
The only remaining step needed is to create a K8sGPT object by providing a few values for its parameters, such as version, model, and backend, as specified in the Kube manifest(k8sgpt-ollama-resource.yaml) given next.
apiVersion: core.k8sgpt.ai/v1alpha1
kind: K8sGPT
metadata:
  name: k8sgpt-ollama
spec:
  ai:
    enabled: true
    model: llama3
    backend: localai
    baseUrl: http://localhost:11434/v1
  noCache: false
  filters: ["Pod"]
  repository: ghcr.io/k8sgpt-ai/k8sgpt
  version: v0.3.39
  #secret:   <--- Uncomment this section for OpenAI
     #name: k8sgpt-openai-secret
     #key: openai-api-key
In the above kube manifest, baseUrl is pointing towards the local Ollama instance. If you have not installed Ollama yet, complete this step from here.
Finally, create the K8sGPT custom resource object, and once completed the operator will automatically create pods for it.
$ kubectl apply -f k8sgpt-ollama-resource.yaml -n k8sgpt-operator-systemVerify the pod creation for result CR.
$ kubectl get result -n k8sgpt-operator-system
NAME                          KIND   BACKEND
defaultnginx7744bd8cc9jdqhl   Pod    localai
defaultnginx7744bd8cc9s7gjs   Pod    localai
defaultnginx7744bd8cc9zv679   Pod    localai
Verify result CR specifications.
$ kubectl get result -n k8sgpt-operator-system -o jsonpath='{.items[].spec}' | jq .
View the result reports from the K8sGPT Operator.
$ kubectl get results/defaultnginx7744bd8cc9jdqhl -n k8sgpt-operator-system -o yaml
apiVersion: core.k8sgpt.ai/v1alpha1
kind: Result
metadata:
 creationTimestamp: "2024-07-20T14:16:17Z"
 generation: 1
 labels:
   k8sgpts.k8sgpt.ai/backend: localai
   k8sgpts.k8sgpt.ai/name: k8sgpt-ollama
   k8sgpts.k8sgpt.ai/namespace: k8sgpt-operator-system
 name: defaultnginx7744bd8cc9jdqhl
 namespace: k8sgpt-operator-system
 resourceVersion: "1990"
 uid: 17990270-55aa-4e9d-ab7e-84df3ae6db5e
spec:
 backend: localai
 details: ""
 error:
 - text: Back-off pulling image "nginx:1.27.30"
 kind: Pod
 name: default/nginx-7744bd8cc9-jdqhl
 parentObject: ""
status:
 lifecycle: historical
To access the Grafana dashboard, port forward the Grafana ClusterIP service to localhost.
$ kubectl port-forward service/prometheus-grafana -n k8sgpt-operator-system 3000:80 --address 0.0.0.0Visit the URL http://NODE_IP:3000 and navigate to Home->Dashboards->K8sGPT Overview, you can view the K8sGPT dashboard along with results.
Conclusion
The benefits of using K8sGPT are immense. Kubernetes clusters can be efficiently troubleshooted using K8sGPT, a robust artificial intelligence tool. It aids in streamlining cluster analysis, decreasing troubleshooting time, and enhancing cluster performance. Furthermore, K8sGPT is developed with the consideration of choosing an AI backend of your preference, whether it be OpenAI, Ollama, or any other.

